How does Displacement Scale actually work in Blender?

Check the video to see what Displacement node value works best.

Oops! Marketing cookies are needed to play this video.
Click here to enable them.

You might need to disable cookie consent blocker if the consent prompt doesn't appear.

More details are in the article below.

Not everyone understands what Displacement is. In simple terms, Displacement is a dent on the surface, as if we were pressing soft clay with the palm of our hand.

So the Displacement Scale is the force with which we press into the clay. However in Blender, we can press not only against the depth of the surface but also to the opposite side.

To understand how the Displacement node works, we need to look at some of the material settings.

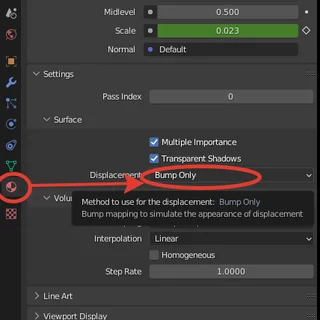
The first method to display Displacement is via "Bump Only".

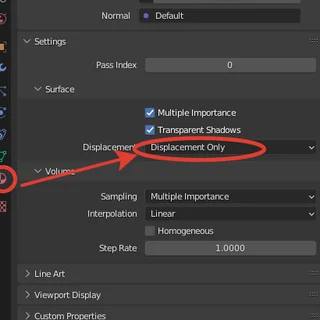
The second method to display Displacement is via "Displacement Only".


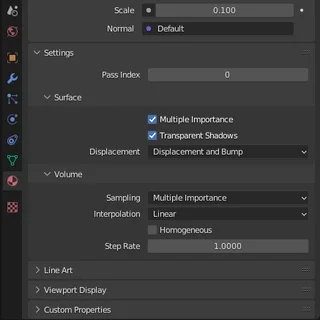
And finally, the last and most resource-consuming method is via "Displacement and Bump".

If we use the "Bump Only" method, there is no actual "extrusion" of the surface. This means that the plane remains plane, but dents and convexities do not appear on it. These changes remain "virtual" and we can see them on the surface only with the help of shadows. Often this is more than enough for a reasonably realistic image. It's the easiest way for the CPU to make calculations because there is no actual change in the geometry and the plane remains plane.

Nevertheless, the Displacement setting is still an important parameter because it determines how accurate the shadows will be and how visible all the irregularities on the surface will be.

It's good to remember that on the Displacement Scale, 1 equals 1 meter of extrusion. In most materials, the surface rarely changes that much. Typically the Displacement Scale ranges from 5 centimeters to a couple of millimeters, that is from 0.05 to 0.001. Below you can see examples of how the shadows change in real-time depending on the Displacement Scale.

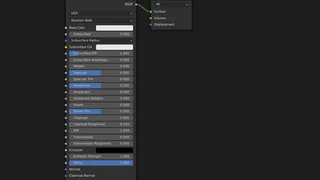
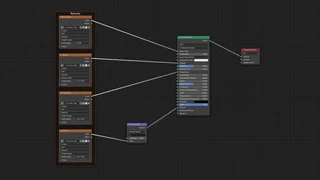
You can find the Displacement node in the Shader Editor

Oops! Marketing cookies are needed to play this video.
Click here to enable them.

You might need to disable cookie consent blocker if the consent prompt doesn't appear.

In the example below, you can see how the shadows on the surface change when you change the Displacement Scale from 0 to 0.1 or from 0 centimeters to 1 meter.

Oops! Marketing cookies are needed to play this video.
Click here to enable them.

You might need to disable cookie consent blocker if the consent prompt doesn't appear.

Notice how near the end of the animation there is distortion and black dots appear on the surface of the bricks due to excessive Displacement Scale.

Below are more examples of surface visualization with different Displacement Scale from 0.01 (1 centimeter to 1 meter).

Oops! Marketing cookies are needed to play this video.
Click here to enable them.

You might need to disable cookie consent blocker if the consent prompt doesn't appear.

  • Displacement Scale 0.03 or 3 centimeters - Soft, correct shadows without distortion or artifacts.
  • Displacement Scale 0.1 or 10 centimeters - Shadows are harsh, artifacts start to appear.
  • Displacement Scale 1 or 1 meter - Shadows are harsh, artifacts and black dots all over the place.

To explain the displacement scale even more clearly, let's turn to the option in the material settings called "Displacement Only".

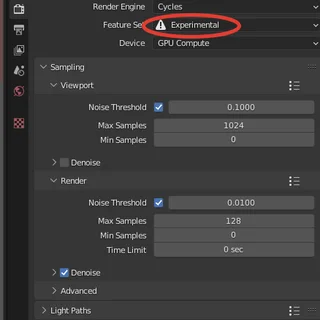
This option is available when certain parameters are activated in the Blender settings.

  1. You need to set Blender to Experimental mode.
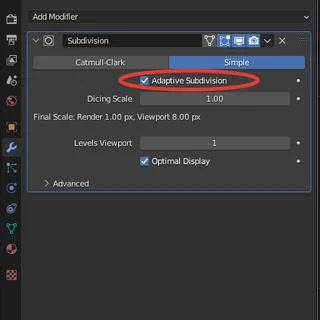
  1. Then you have to apply the Subdivision surface modifier and activate the "Adaptive Subdivision" option.

In the video examples below, you can see how Displacement Scale works with the Experimental mode, "Adaptive Subdivision" and "Displacement Only".

Oops! Marketing cookies are needed to play this video.
Click here to enable them.

You might need to disable cookie consent blocker if the consent prompt doesn't appear.

In this video, you can see how the surface of the material changes as the Displacement Scale increases from 0 to 1 (0 to 1 meter)

Oops! Marketing cookies are needed to play this video.
Click here to enable them.

You might need to disable cookie consent blocker if the consent prompt doesn't appear.

So, when you break it down, it's actually simple :) Just imagine how deep the irregularities on the material you are working with should be and set the Displacement Scale according to these values.

Thank you for reading and have a great BlenderKit day!
See next articles

Inverted normals

The quickest way to fix it in Blender

Brush Preview

No need to be special

Why are not all HDRs accepted?

Only the best for our artists

Upload real HDRs

Low range HDRs aren't really HDRs

How to improve scene composition?

It's all about the details

Add cameras to your scene

The more the merrier

Unclear scenes

Give your 3D scene purpose

Insufficient quality of uploaded asset

We all have to start somewhere

Asset fixed during validation

Sometimes miracles happen

How to improve thumbnail quality?

Great assets deserve great thumbnails

OpenGL vs DirectX normal maps

Open minds open hearts

How to name and describe assets?

The way to get better search results

Missing profile info

Every creator needs a profile

Upload looks like a test

Testing is awesome when it’s privet

Tiling textures

Visible tilling versus tileable textures

Unfinished asset

It's not over till it's over

Incorrect upload

Always test download your assets

Asset is too similar to previous upload

Just changing the color isn't enough

Duplicate asset

This never ends well

Disconnected nodes

How to fix them?

Nodes spaghetti

We prefer chocolate

Tutorial result models

Enough with the donuts

Material too simple

Let's make it better

IOR in materials

Let’s work it out

Subsurface scattering radius

Understanding SSS in Blender

Unconventional Thumbnails

Use standard BlenderKit previews for materials

Material PBR setup

How to do it right?

Wood mapping

How to do it?

How to reduce model file size in Blender?

Great tips to make life lighter

Manufacturer and designer tags

Don’t forget about them

Model Topology Issues

Why have issues?

Where are my textures?

Understanding why textures are missing from your file

Cycles / EEVEE systems

The way to improve materials

Why applying scale (and rotation) matters?

So many reasons to apply scale in Blender

Model unrealistic shape

The shape/proportions of the of the object aren't realistic. Check reference pictures to study more the real shape of this object.

Combining multiple assets

When to upload models separately and when to upload a composition?

Unrealistic texture size

How to correct it?

Models without materials

Not at our library

Authorship verification

How to prove your cool stuff is truly yours?

Put the model on the ground

How to position your model?

How important are good tags?

If you want your assets to be found, invest into tags

Original designs

Advantages and disadvantages of uploading original interior design models

Texel density in Blender

How to set it up accurately?

No AI Assets

Say no to AI, Stand with Artists